Self-hosted deployment
The self-hosted deployment involves running your infrastructure locally or on a remote cloud server to host your application node.
Here are the requirements:
- Wallet with sufficient funds on the chosen network.
- A cloud server
- A PostgreSQL database
- A web3 provider for interacting with the selected network
Initiating deployment
-
Compile your application into RISC-V architecture and consequently build a Cartesi machine by running:
cartesi build -
Run the command below to start the deployment process.
cartesi deploy --hosting self-hosted --webapp https://sunodo.io/deploy
The command generates a Docker image containing the rollups node and machine. You will be redirected to a web application to deploy the necessary smart contracts.
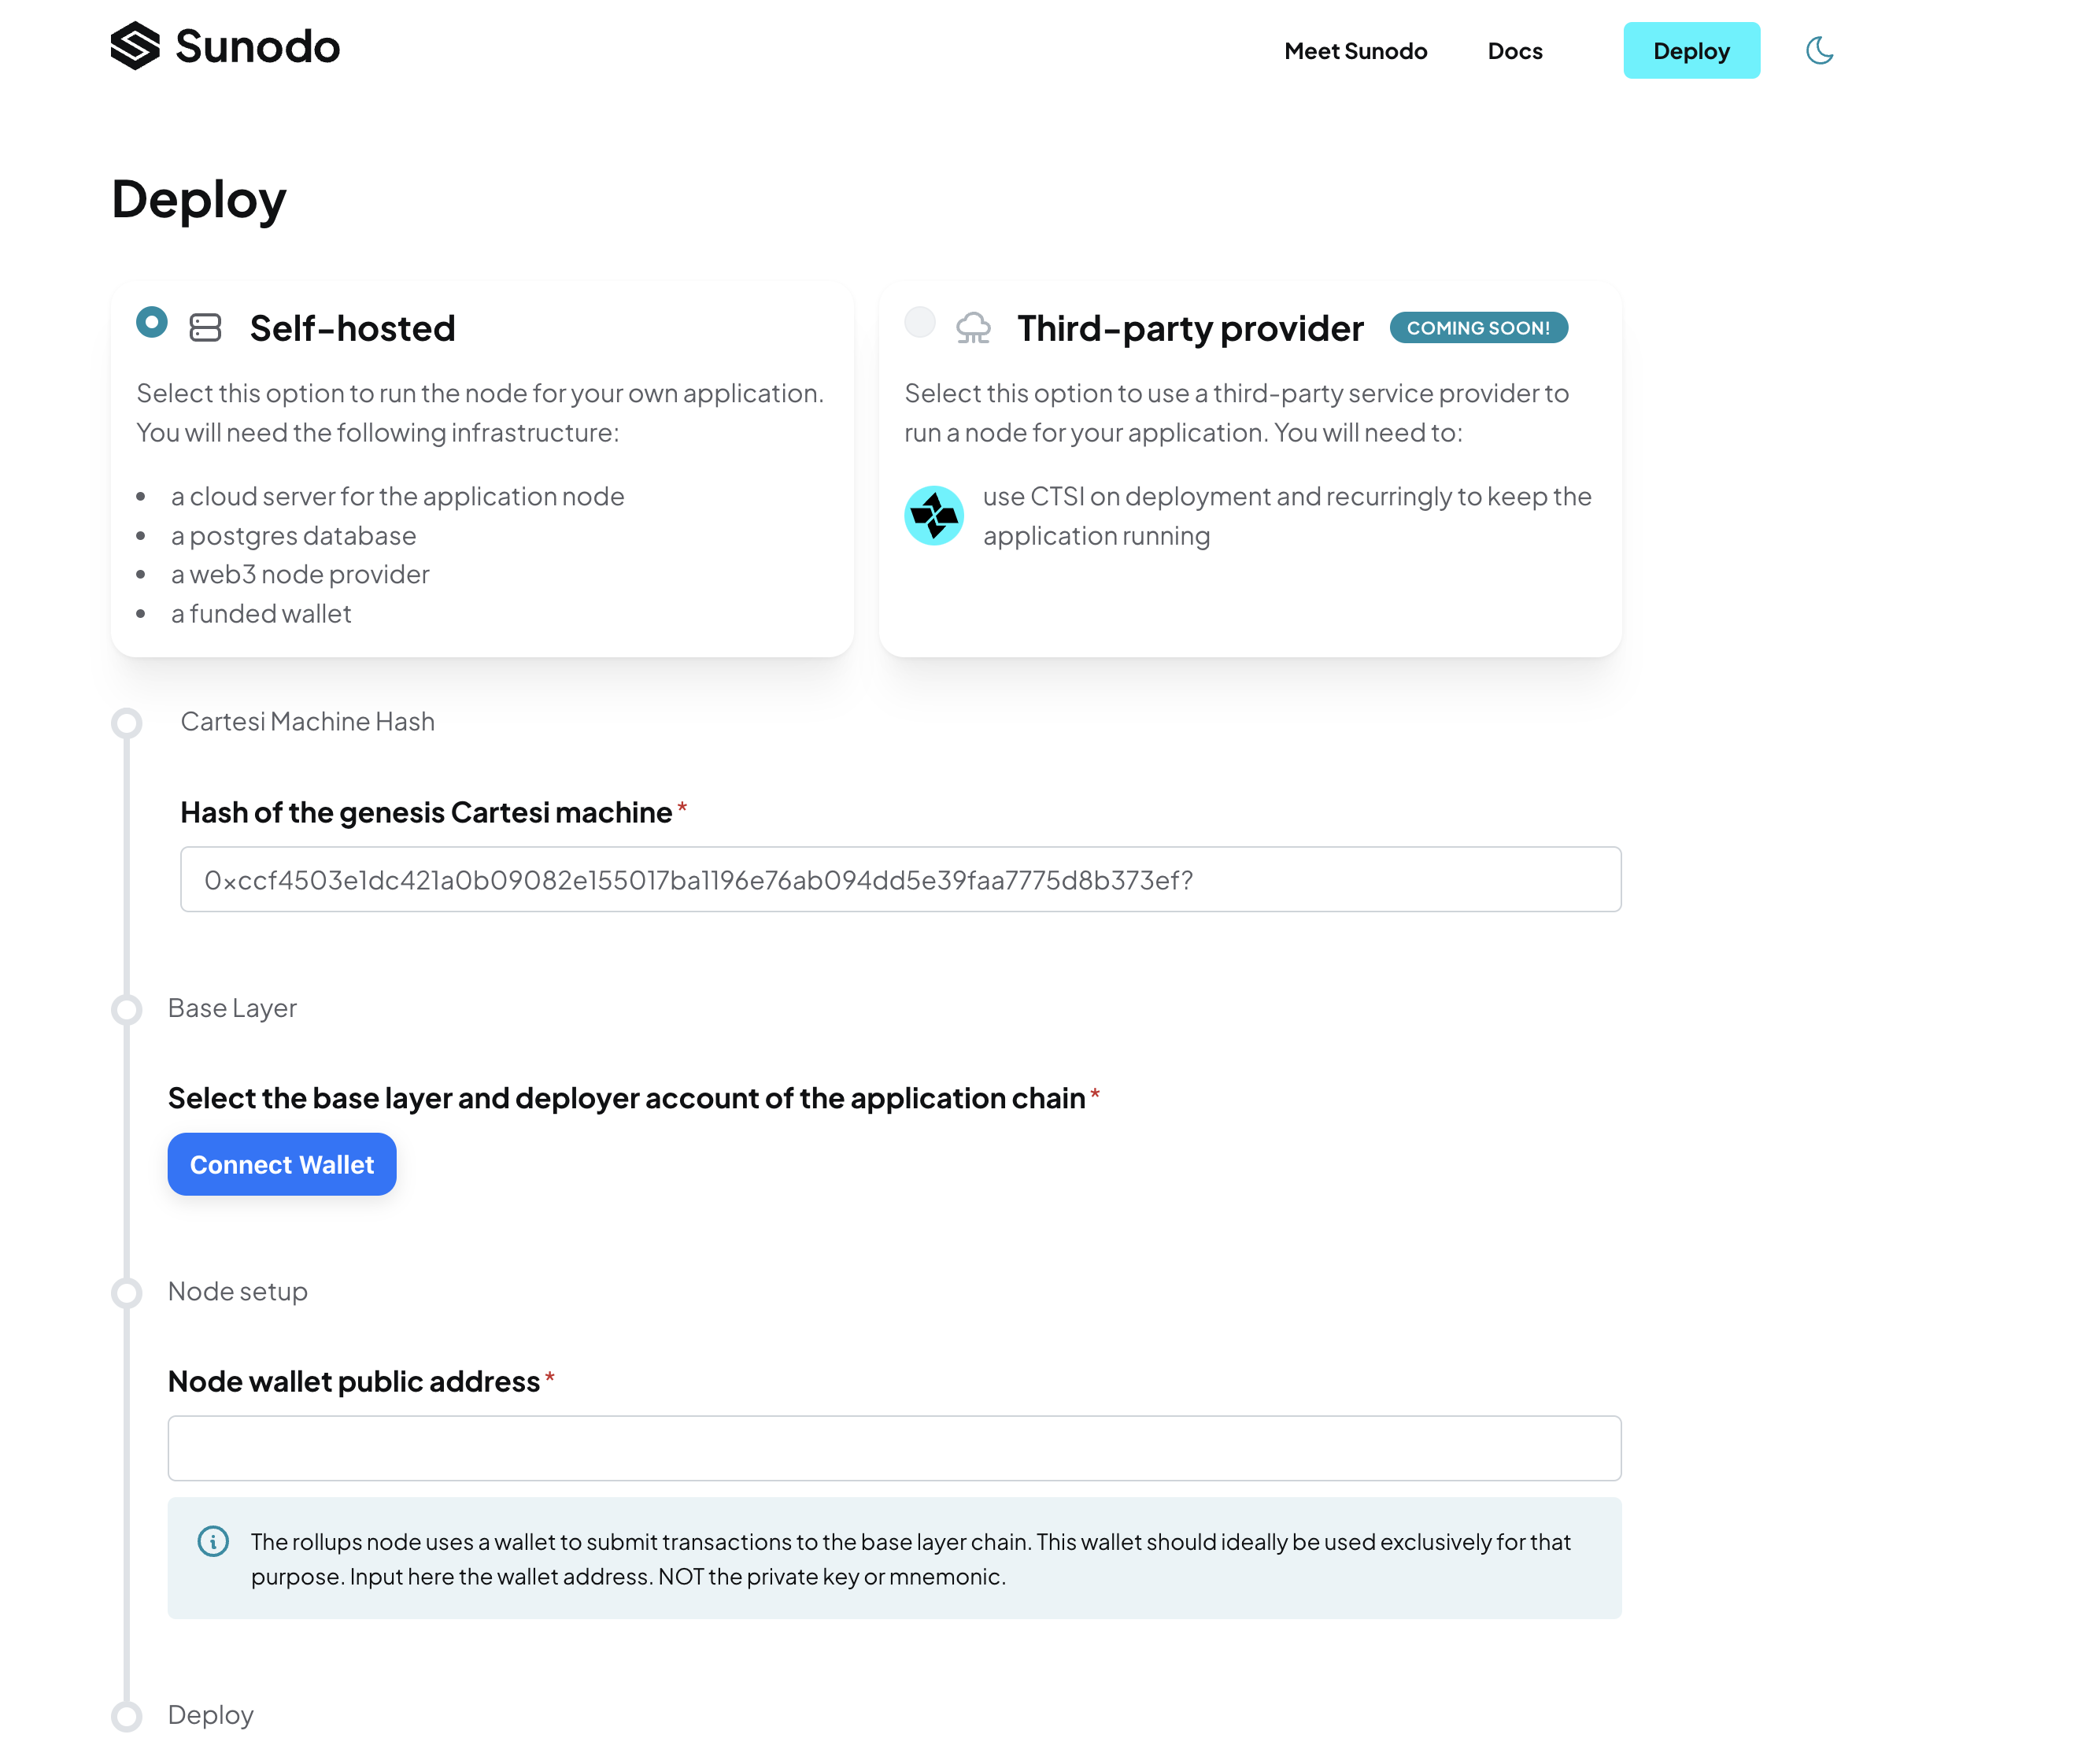
Deploying the contracts
On the deploy web interface, the hash of the Cartesi machine will be automatically configured.
-
Connect your wallet to set the application chain’s base layer and deployer account.
-
Create a wallet specifically for Cartesi rollups node transactions. The Cartesi rollups node will use this wallet to submit transactions to the base layer. Paste the public address of this wallet.
- After successful deployment, the node’s configuration is presented in a
.envfile and a.tomlformat. This config file includes the addresses of the deployed smart contracts and information on the base layer chain.
You will need the .env when hosting the node on the cloud provider and the .toml file when hosting on Fly.io.
Hosting the node
You’ll need a server to host the application node and keep it operational 24/7. This server will expose a single port for client access to the rollups node APIs through GraphQL or Inspect requests.
The server requirements depend on your application's expected usage and the specifications of the Cartesi machine you're using, such as its RAM size and total capacity. Consider a minimum of 8GB of RAM, and adjust as needed.
The Cartesi rollups node is distributed as a Docker image. Any popular cloud provider, like AWS, GCP, Azure, Digital Ocean, or Linode, can run docker containers and hence can be used to host the rollups node.
Alternatively, you can use a service like Fly.io to deploy your application node.
Hosting on a cloud provider
-
Download the
.envconfiguration file into the root directory of your application. -
Obtain HTTP and WebSocket URLs from a web3 provider for the
CARTESI_BLOCKCHAIN_HTTP_ENDPOINTandCARTESI_BLOCKCHAIN_WS_ENDPOINTvariables.
Here is an example from Alchemy:
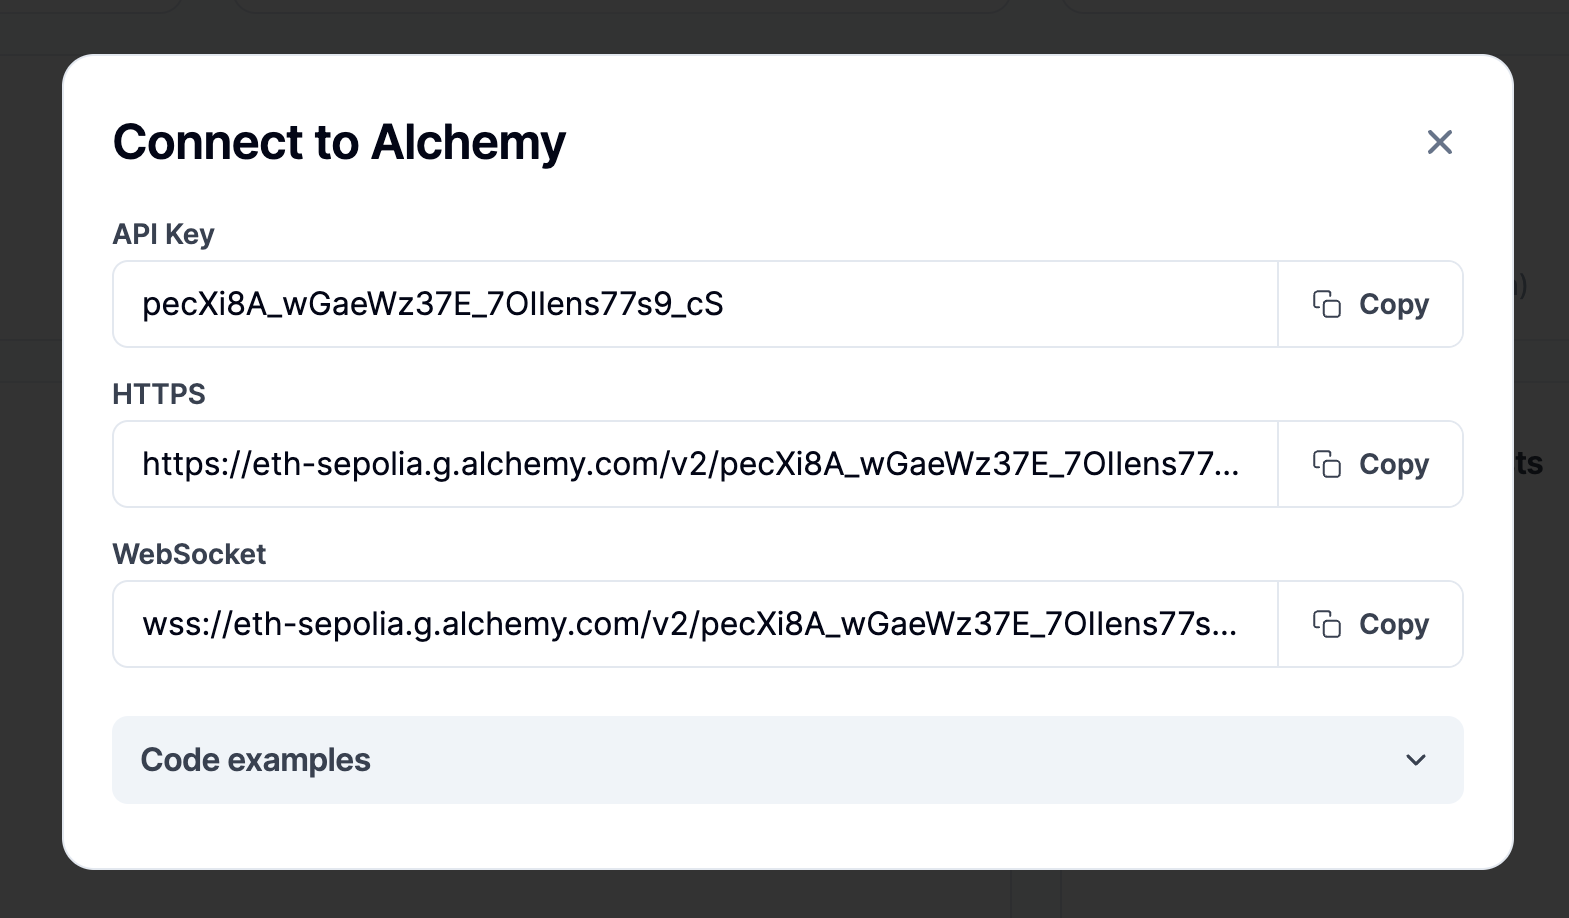
The web3 provider URLs and wallet mnemonic are sensitive information that can compromise your application and funds. You should keep it secure and private at all times.
- Create a PostgreSQL database and configure the connection string in the
.envfile.
The connection string for a PostgreSQL database must be configured at the CARTESI_POSTGRES_ENDPOINT variable.
You can use any PostgreSQL database, whether managed by a cloud provider or set up on your local infrastructure. The key configuration required is the connection string, encompassing the database URL, username, password, and name. The node necessitates a PostgreSQL database to store the application state, which is accessible via the GraphQL API.
- With all the config variables set, here is how you can run the node on your local machine:
docker run --env-file <env-file> -p 10000:10000 <image-id>
Replace <env-file> and <image-id> with the .env file name and sha256 hash of your Cartesi machine.
The image can be tagged using docker tag.
You can deploy your node with a cloud provider or use any managed container solution, like Kubernetes.
Hosting on fly.io
Fly.io is a platform where you can conveniently deploy applications packaged as Docker containers.
If deploying to Fly.io from macOS with Apple Silicon, create a Docker image for linux/amd64 with: cartesi deploy build --platform linux/amd64
-
Create an application:
$ fly app create <app-name>
New app created: <app-name> -
Create a Postgres database application:
fly postgres create --initial-cluster-size 1 --name <app-name>-database --vm-size shared-cpu-1x --volume-size 1Save the connection string provided by the command output.
-
Attach database to the node application:
fly postgres attach <app-name>-database -a <app-name> -
Download
fly.tomlfile from deploying the contracts and move it to your application directory: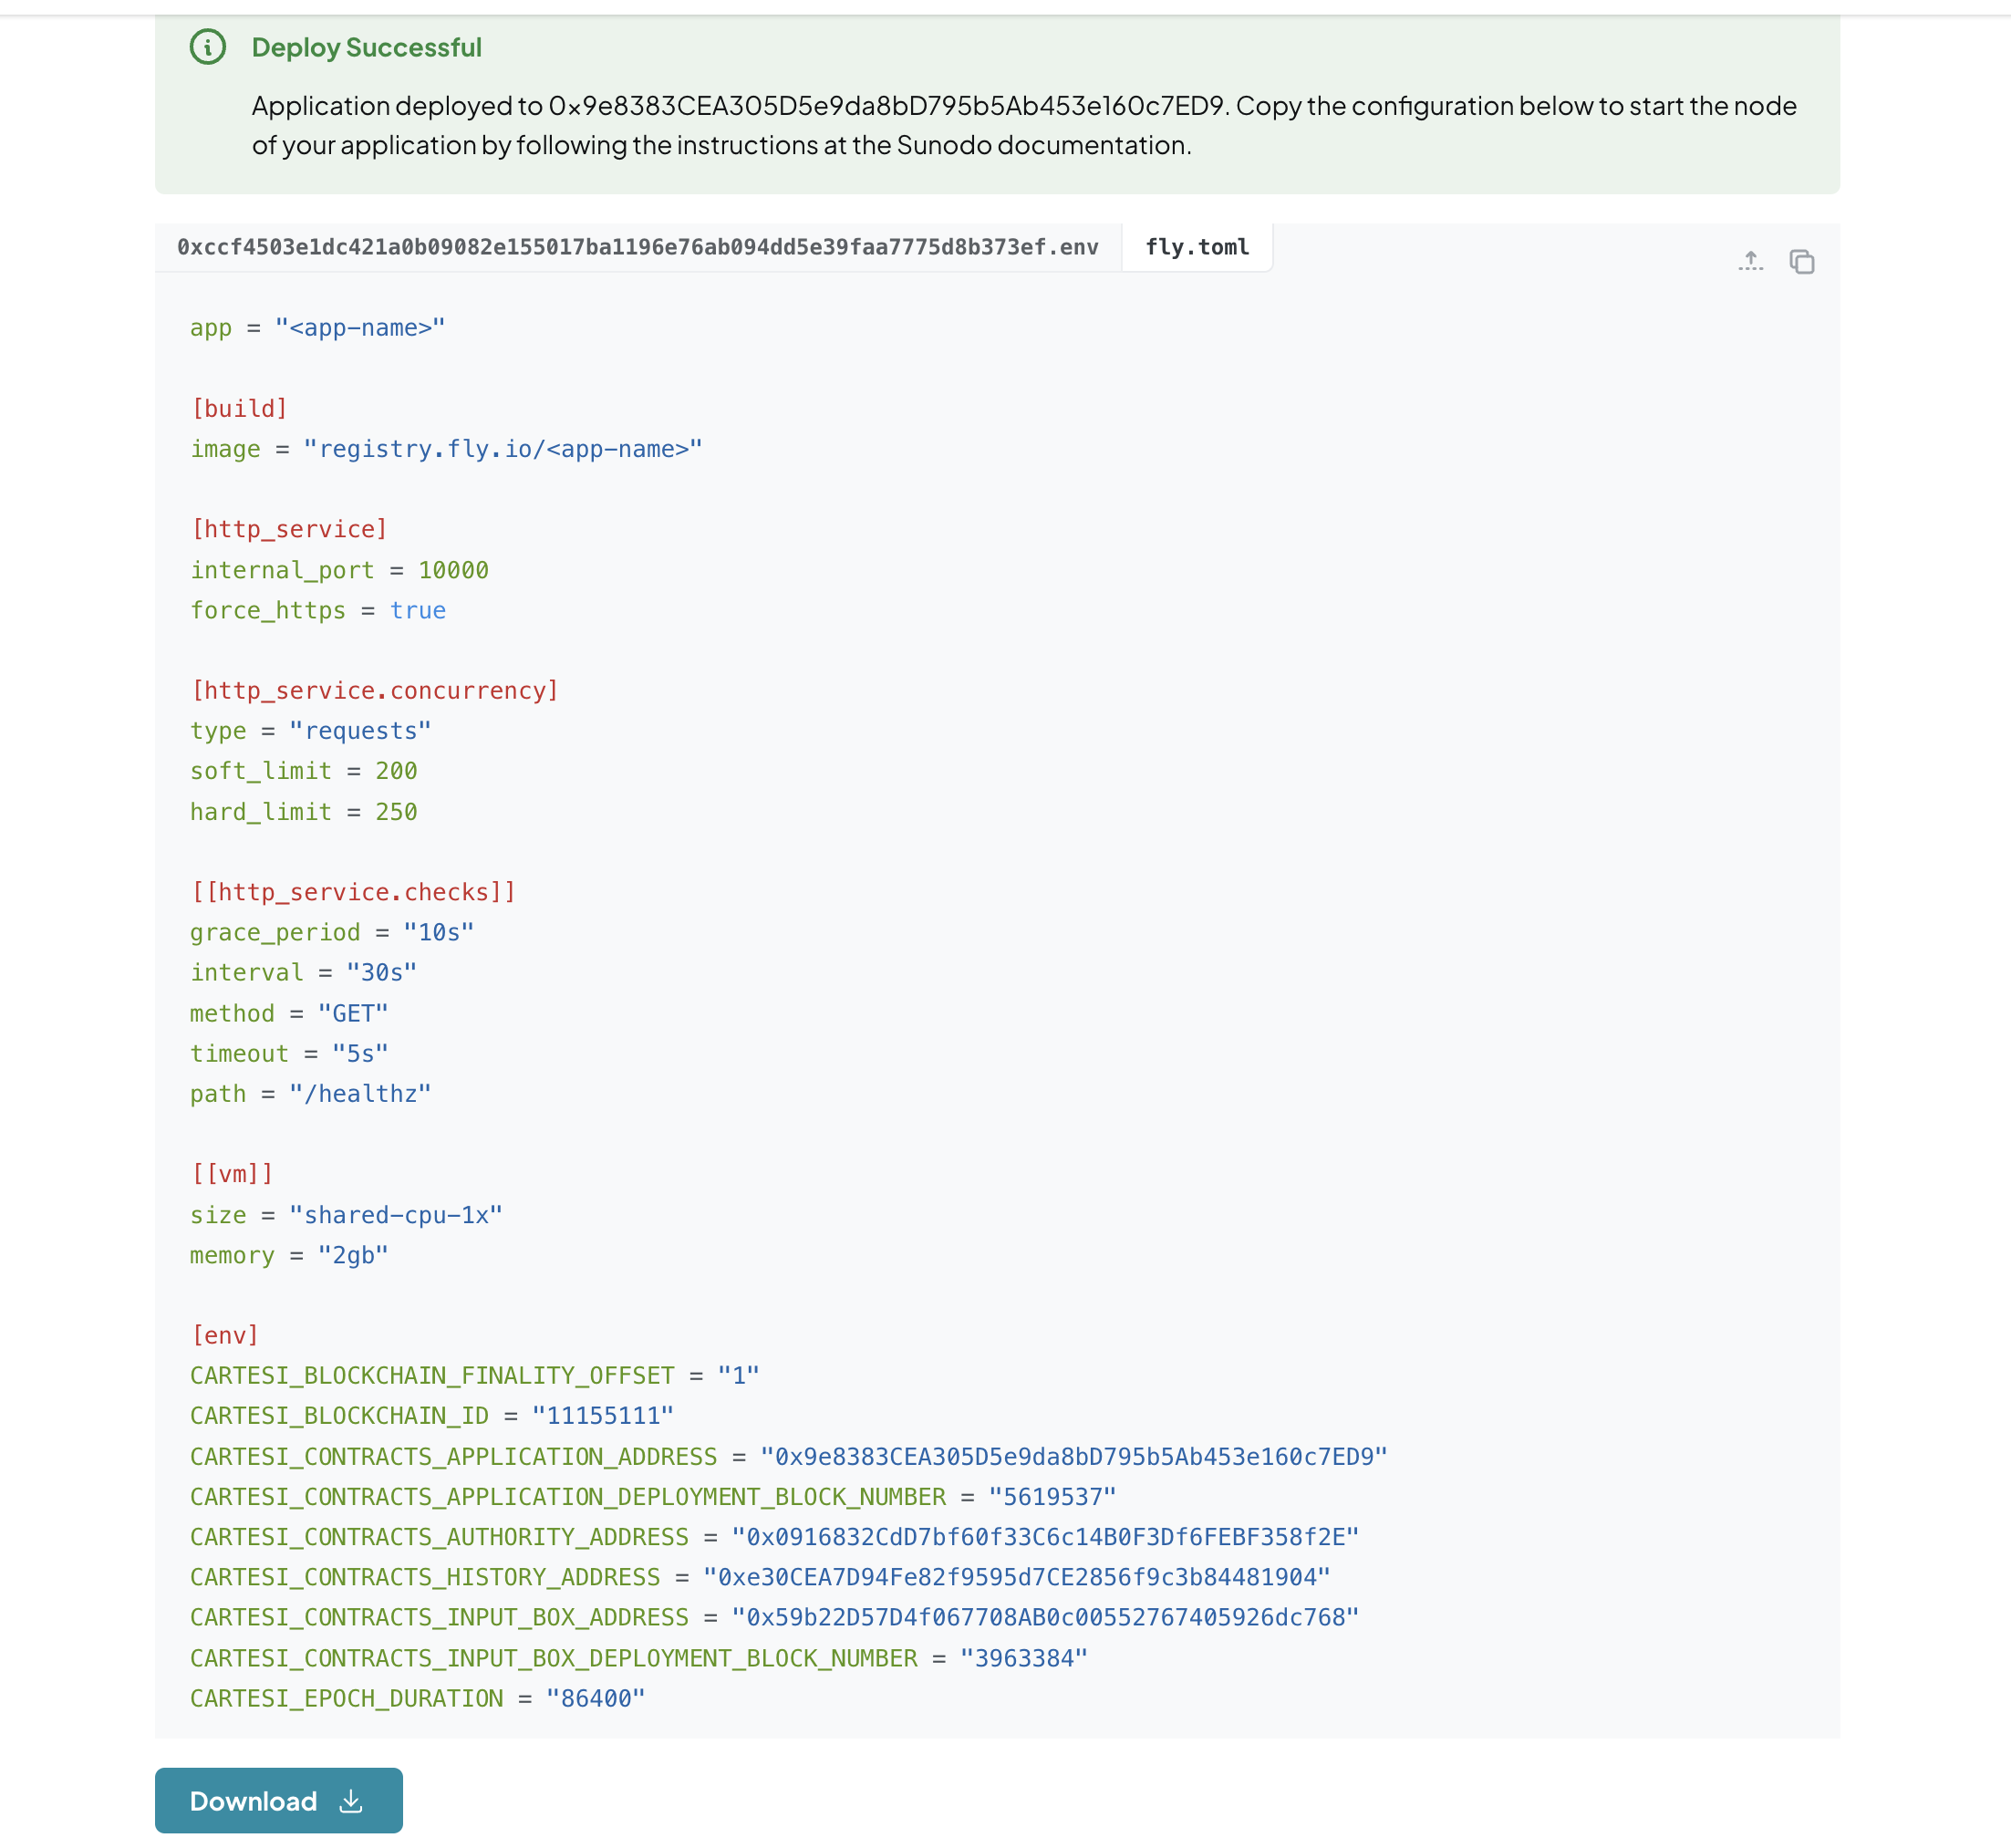
-
Edit the
fly.tomlfile to change all occurrences of<app-name>to the name of your application -
Create secrets for sensitive configuration with the actual values:
fly secrets set -a <app-name> CARTESI_BLOCKCHAIN_HTTP_ENDPOINT=<web3-provider-http-endpoint>
fly secrets set -a <app-name> CARTESI_BLOCKCHAIN_WS_ENDPOINT=<web3-provider-ws-endpoint>
fly secrets set -a <app-name> CARTESI_AUTH_MNEMONIC=`<mnemonic>`
fly secrets set -a <app-name> CARTESI_POSTGRES_ENDPOINT=<connection_string>
Set value of the
connection_stringas provided by step 4. -
Deploy the node:
Tag the image produced at the beginning of the process and push it to the Fly.io registry:
flyctl auth docker
docker image tag <image-id> registry.fly.io/<app-name>
docker image push registry.fly.io/<app-name>
fly deploy -a <app-name>